If you notice that some coordinates in your Cloud Panel aren’t being converted into locations, you can resolve this by adding a Google Maps API key. Google provides a free monthly quota for each key, which is generally sufficient for personal use in the Cloud Panel.
Follow the steps below to create your Google Maps API key.

What You’ll Need
Before starting, make sure you have:
- A Google account.
- Access to Google Cloud Console.
- A billing account set up in Google Cloud. Google Maps APIs are free up to $200 per month, but usage beyond that is billed.
- A Google Cloud project (you can create a new one or use an existing project).
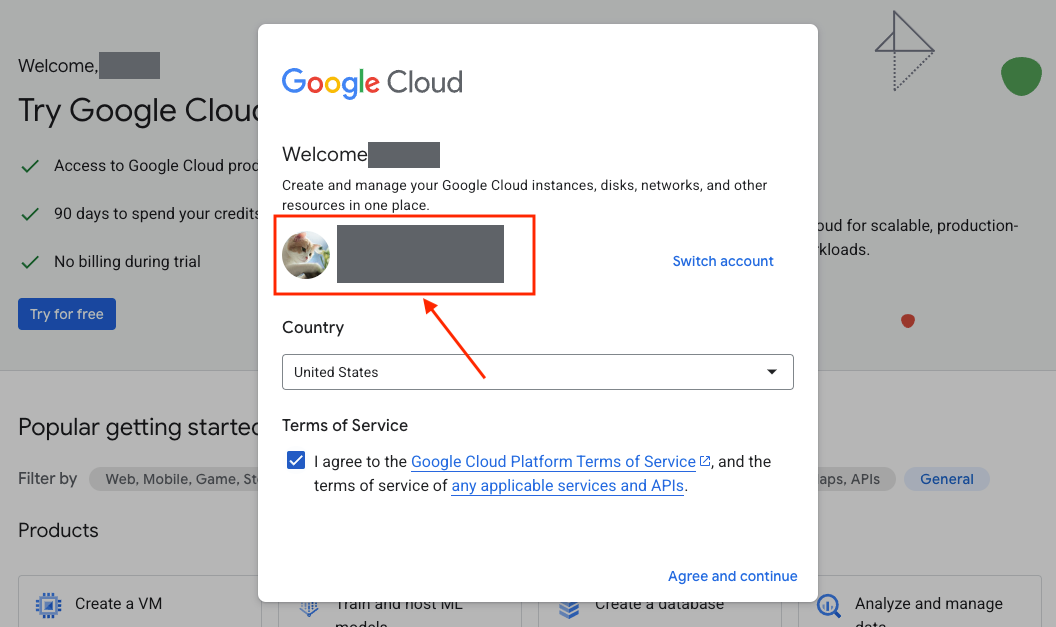
Step 1: Log in to Google Cloud Console
First, you’ll need to access the Google Cloud Console. This is where you manage all of your Google Cloud resources.
- Go to Google Cloud Console.
- Sign in with your Google account.
If this is your first time, you’ll need to create a Google Cloud account and link a billing method.
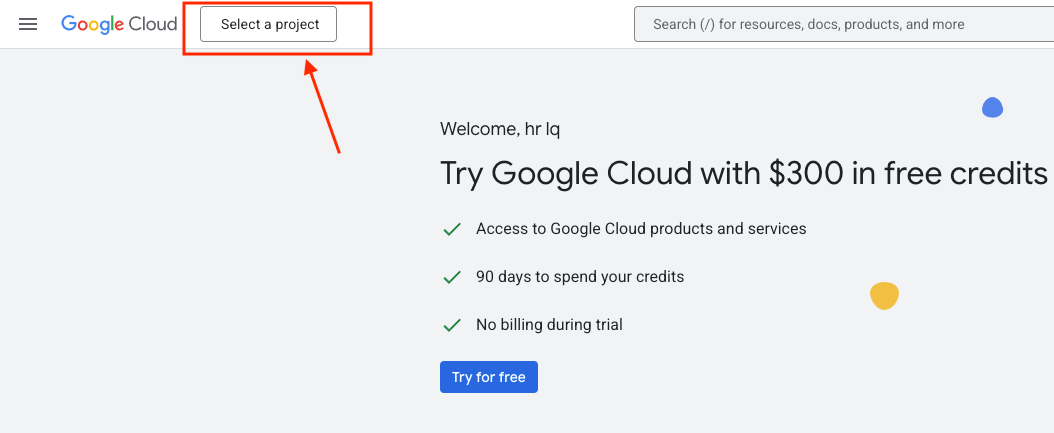
Step 2: Create or Select a Project
The API Key you generate will be tied to a specific project. If you don’t already have a project set up, follow these steps:
-
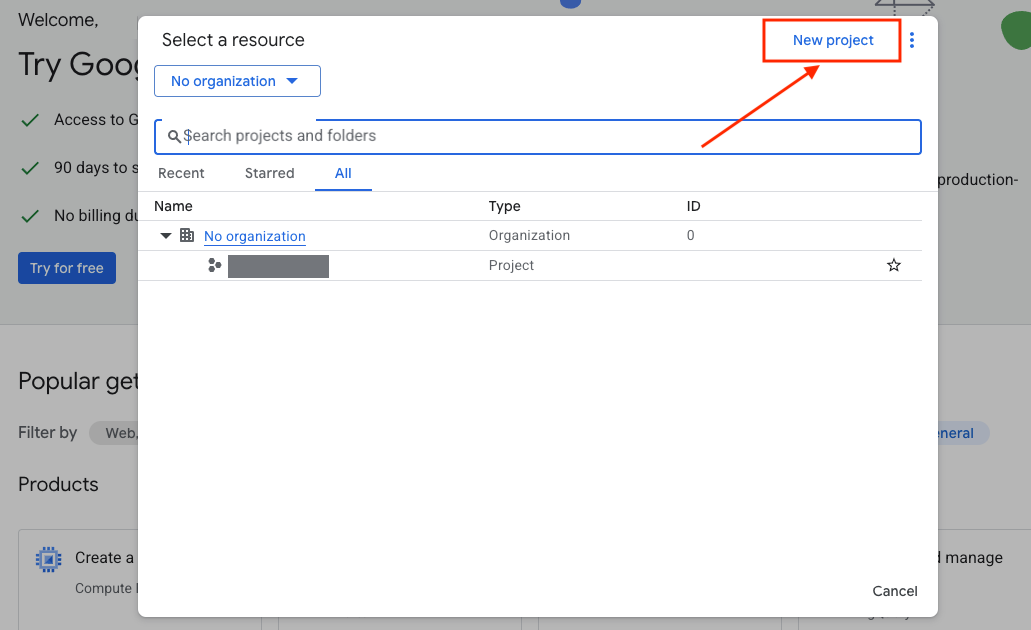
In the Cloud Console, click the project selector in the top-left corner.
-
Choose New Project from the dropdown.
-
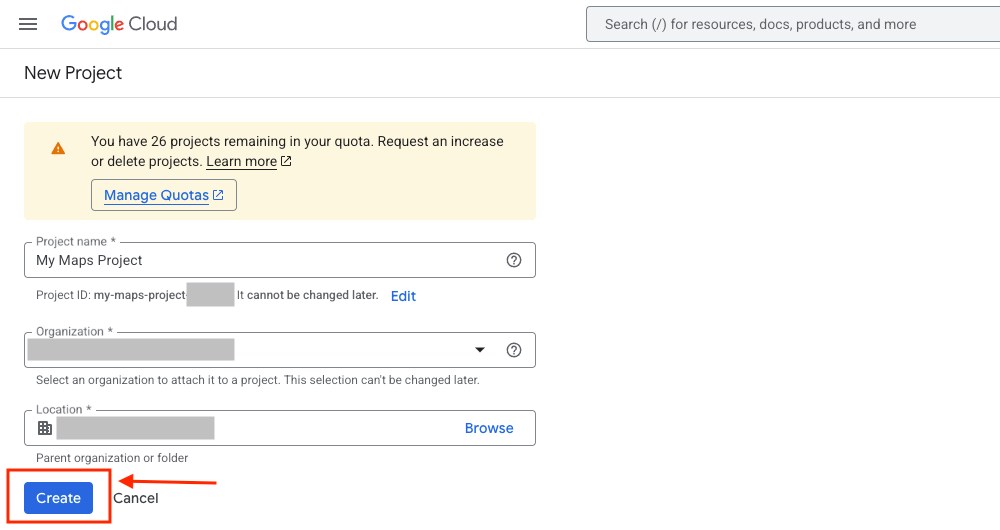
Enter a project name (e.g., ‘My Maps Project’) and click Create.
If you already have an existing project, you can simply select it from the list.
Step 3: Enable the Required Maps API
Once your project is set up, you need to enable the APIs you’ll be using. For example, you might need the JavaScript API, Geocoding API, or Directions API depending on your needs.
-
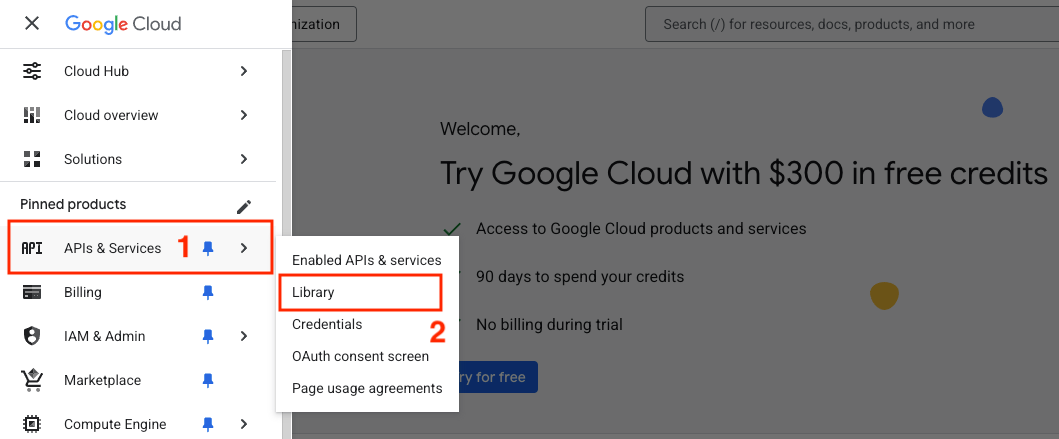
In the left-hand menu, go to APIs & Services and select Library.
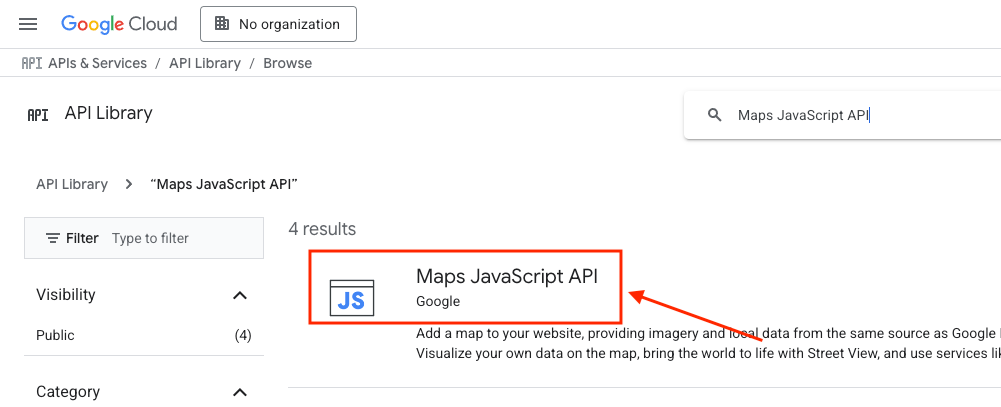
-
Search for Maps JavaScript API.
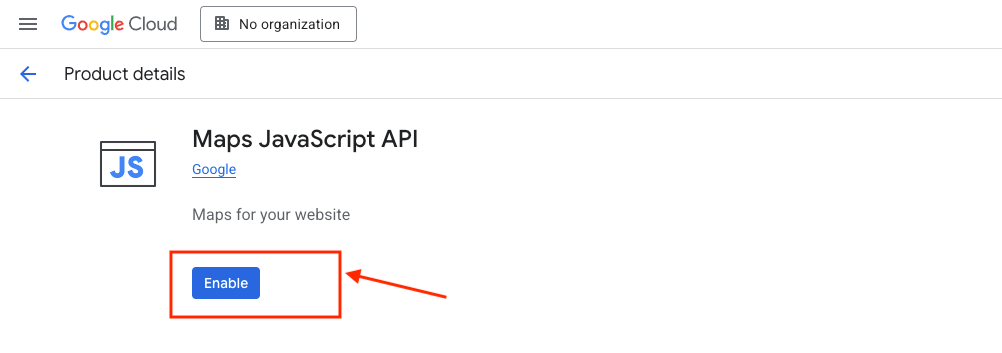
-
Click Enable.
-
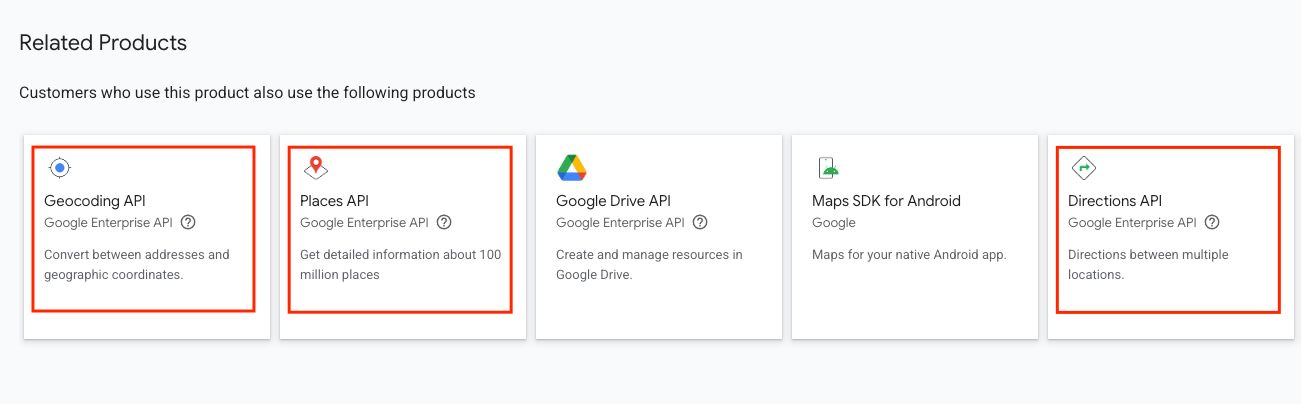
Repeat the process for other APIs like Geocoding API, Places API, or Directions API, depending on what you require for your project.
Enabling these APIs allows you to use Google’s map-related services within your project.
Step 4: Create an API Key
Now that your project is ready, you can create an API Key.
-
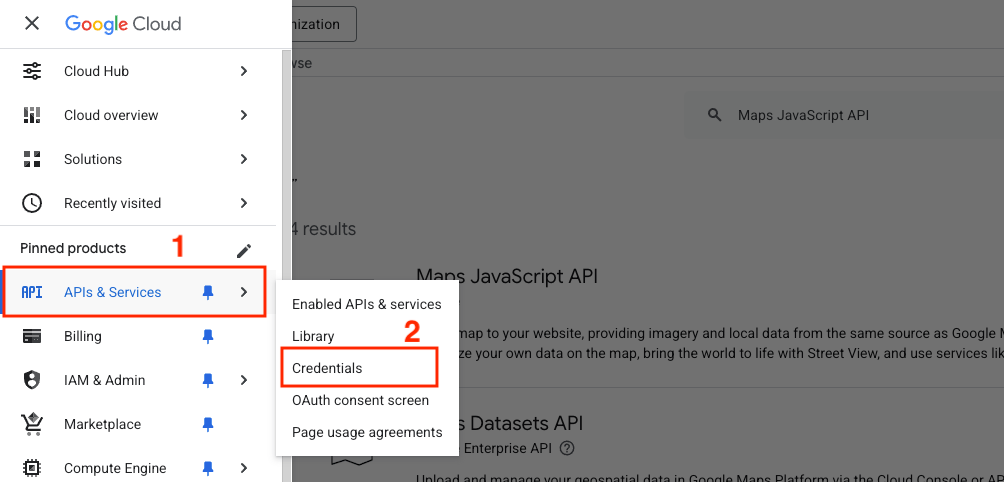
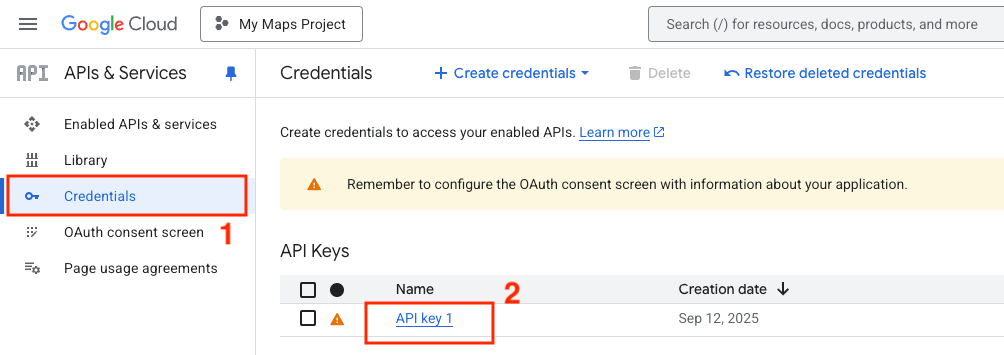
Go to APIs & Services > Credentials in the left-hand menu.
-
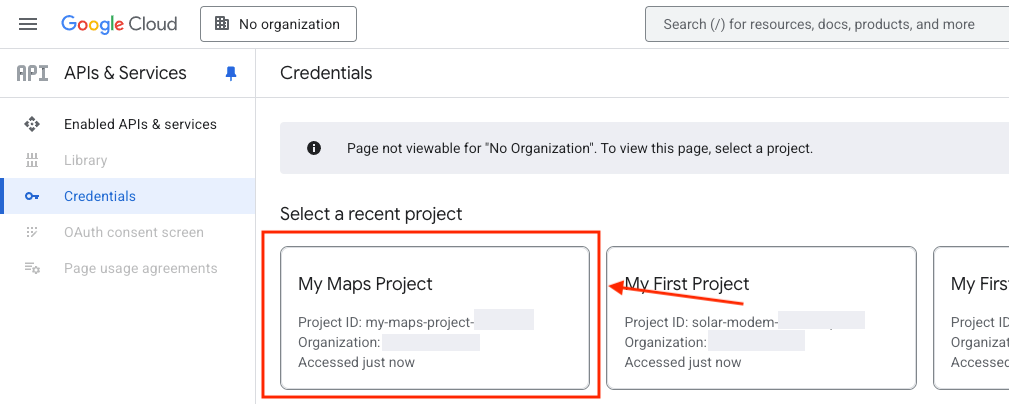
Select the project you just created.
-
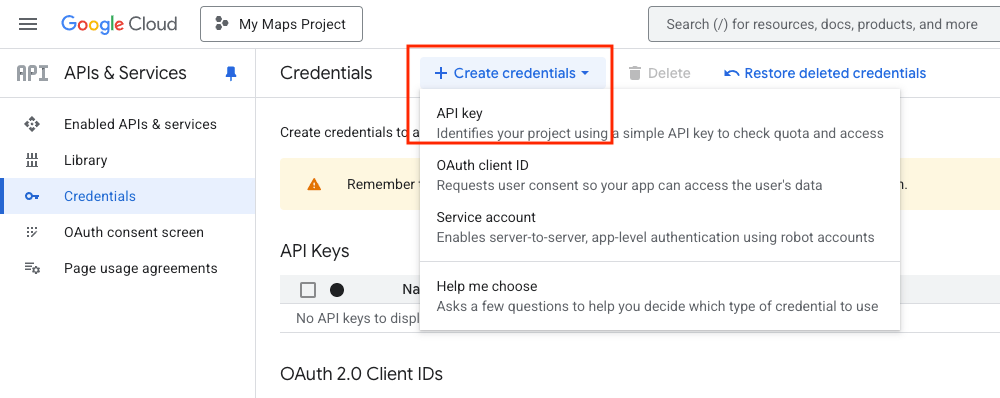
Click on + CREATE CREDENTIALS and select API Key.
-
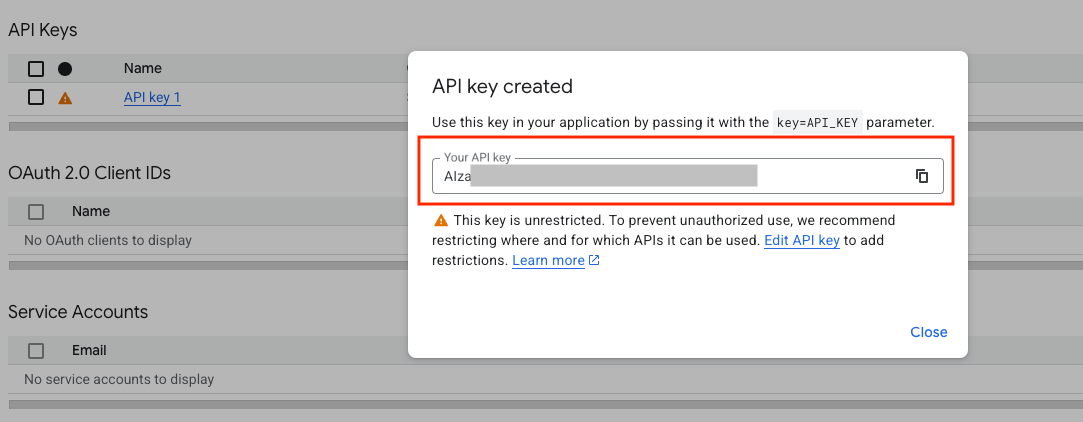
A new API Key will be generated. Copy this key for use in your project’s code.
The API Key is the authentication token allowing your application to request the Google Maps APIs.
Step 5: Set Security Restrictions
Setting restrictions on your API Key is crucial for security. Without proper restrictions, anyone could misuse your API Key, leading to potential abuse or unexpected costs.
-
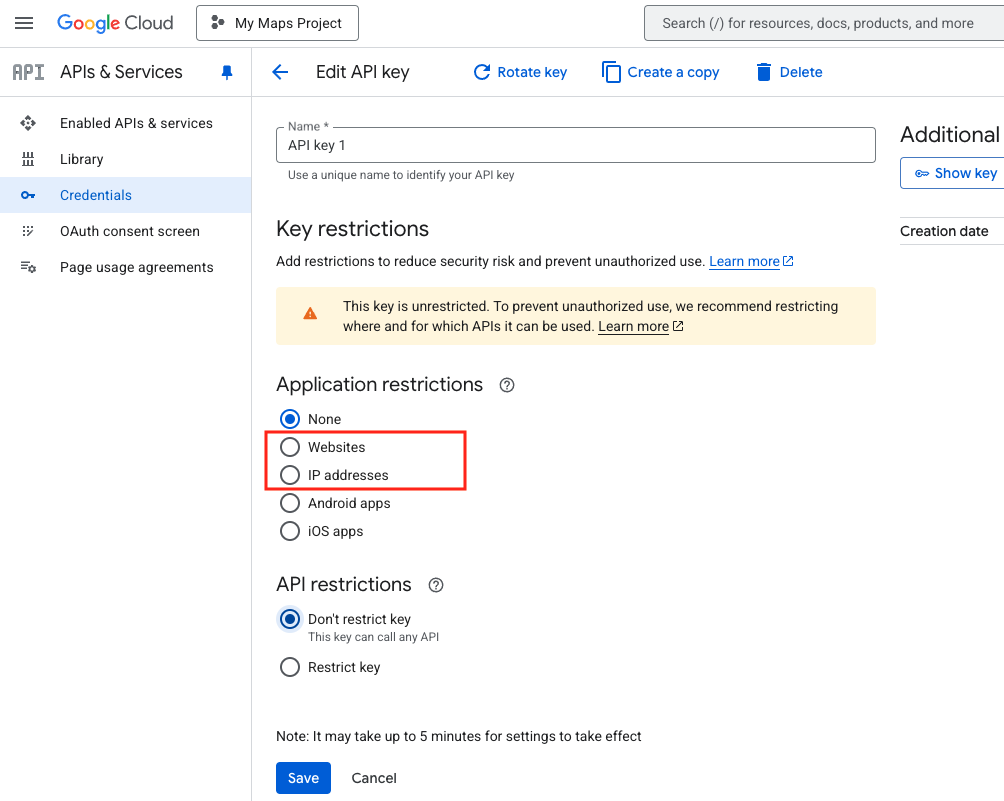
In the Credentials section, click on the newly created API Key.
-
Under Application restrictions:
- For web projects, select HTTP referrers and enter your website domain (e.g.,
https://yourdomain.com/*). - For server-based requests, select IP addresses and enter the IP addresses of your servers.
- For web projects, select HTTP referrers and enter your website domain (e.g.,
-
Under API restrictions, only check the APIs you’ll be using in your project, such as Maps JavaScript API and Geocoding API.
These restrictions ensure that the API Key can only be used in the intended context and for the APIs you’ve enabled.

Step 6: Use the API Key in Your Code
Now that your API Key is ready and securely configured, you can start using it in your project’s code.
Simply insert the API Key where necessary in your code. For example, in JavaScript, you might include it like this:
<script src="https://maps.googleapis.com/maps/api/js?key=YOUR_API_KEY&callback=initMap" async defer></script>
Step 7: Troubleshoot Common Errors
While working with the API Key, you may encounter some common errors. Here’s how to fix them:
-
InvalidKeyMapError – This error usually means that the API Key is incorrect. Double-check that you’ve copied the correct key from the Cloud Console.
-
Billing not enabled – If this error appears, it means you haven’t activated billing for your Google
Cloud project. Make sure to enable billing to start using Google Maps APIs.


Step 8: Set Up Billing and Quotas
Google Maps APIs come with a free usage quota, but you’ll be charged once you exceed the limits. To avoid unexpected charges, it’s essential to set up billing alerts.
-
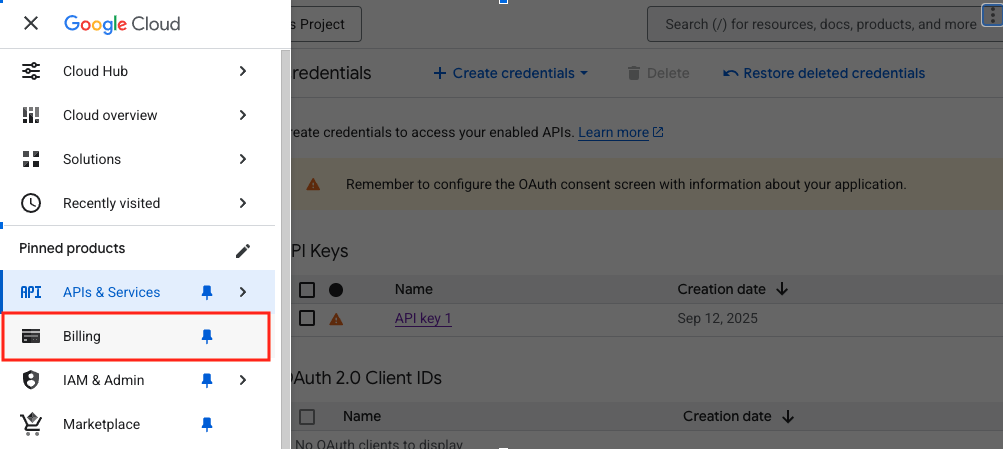
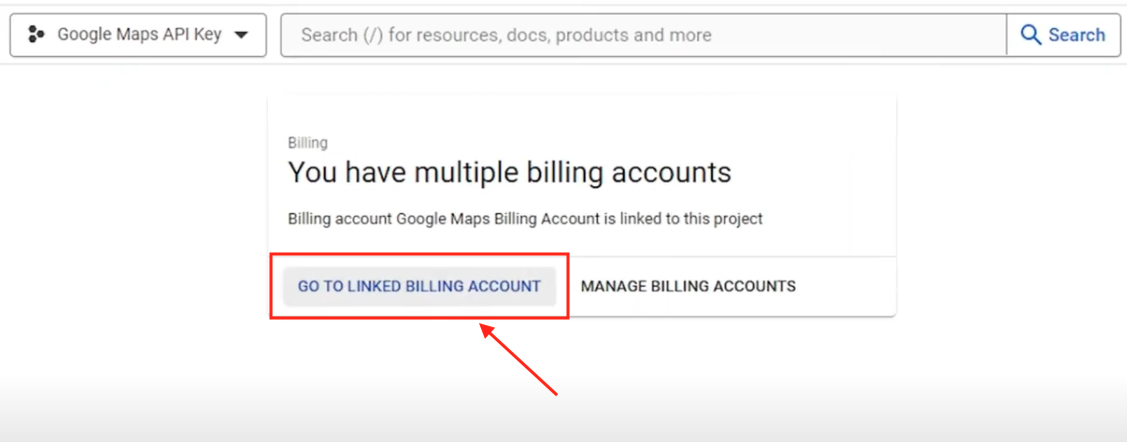
Navigate to the Google Cloud Billing section in the Console.
-
Set up Budget & Alerts to monitor your usage and receive notifications when you approach or exceed your budget.
Setting up a budget helps ensure that you don’t unintentionally incur high costs while using Google Maps services.
Conclusion
You’ve now successfully created and configured your Google Maps API Key! By following these steps, you’ve ensured that your API Key is both functional and secure.